How many home improvement shows have you watched in which a room is given a modern update with a painted horizontal stripe? How many times has the show actually shown the process of placing and taping that stripe? I can't remember one demonstration.
Just in case a team of flunkies hasn't appeared in your living room to do all the dirty work, here are my tips after actually taking on this project:
1) Get a level. Lord, please get a level. You cannot eyeball this unless you have laser-leveling eyes. You don't need a fancy level, just the run of the mill type from your local hardware store. When considering the placement of the stripe, think about the golden ratio, which may be roughly two-thirds. Whatever the case, two-thirds of the way up the wall is a good height for a stripe.
2) Use string to create a level line to tape against. We decided to use string and thumb tacks. This resulted in a lot of hole-filling, so you might try tape. Give the walls a dusting with a tack cloth to get rid of any crud that will keep the tape from sticking properly. Use a measuring tape from the floor up to set the string. Tape each end and then test the span of string with the level, making adjustments as necessary. Use the blue painter's tape to tape along the outside edge of the string. Repeat around the room for the top, bottom, and edges of the stripe.
3) Don't waste money on glaze. I heard on a decorating show that rolling a coat of clear acrylic glaze over the tape would prevent seep through when you put the paint on. Not true. This technique was just a wasted step. I did see on another tip segment that you can use the back of a plastic spoon to push the edge of the tape against the wall. That will definitely cut down on seepage, and it is easy to go back with a small paint brush and touch-up the original wall color along any leaky edges.
4) Score the tape before you pull it off. Wait until the paint is dry and use a razor to lightly score the tape's edge. This will prevent the stripe paint from being pulled off the wall with the tape. It also helps to use flat latex paint. Any thing with a sheen tends to pull off more easily in my experience.
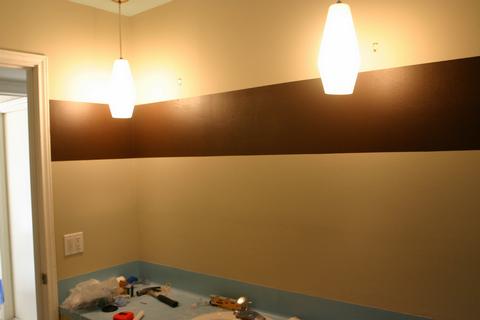
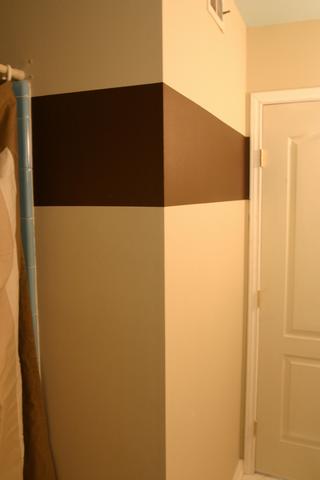
Here's a photo of what we did. This is a 70s bathroom with cream walls and a turquoise counter. The chocolate stripe gives it an updated cool. It's not all put together yet, but we're getting there.
Just in case a team of flunkies hasn't appeared in your living room to do all the dirty work, here are my tips after actually taking on this project:
1) Get a level. Lord, please get a level. You cannot eyeball this unless you have laser-leveling eyes. You don't need a fancy level, just the run of the mill type from your local hardware store. When considering the placement of the stripe, think about the golden ratio, which may be roughly two-thirds. Whatever the case, two-thirds of the way up the wall is a good height for a stripe.
2) Use string to create a level line to tape against. We decided to use string and thumb tacks. This resulted in a lot of hole-filling, so you might try tape. Give the walls a dusting with a tack cloth to get rid of any crud that will keep the tape from sticking properly. Use a measuring tape from the floor up to set the string. Tape each end and then test the span of string with the level, making adjustments as necessary. Use the blue painter's tape to tape along the outside edge of the string. Repeat around the room for the top, bottom, and edges of the stripe.
3) Don't waste money on glaze. I heard on a decorating show that rolling a coat of clear acrylic glaze over the tape would prevent seep through when you put the paint on. Not true. This technique was just a wasted step. I did see on another tip segment that you can use the back of a plastic spoon to push the edge of the tape against the wall. That will definitely cut down on seepage, and it is easy to go back with a small paint brush and touch-up the original wall color along any leaky edges.
4) Score the tape before you pull it off. Wait until the paint is dry and use a razor to lightly score the tape's edge. This will prevent the stripe paint from being pulled off the wall with the tape. It also helps to use flat latex paint. Any thing with a sheen tends to pull off more easily in my experience.
Here's a photo of what we did. This is a 70s bathroom with cream walls and a turquoise counter. The chocolate stripe gives it an updated cool. It's not all put together yet, but we're getting there.
3 comments:
Very nice. Bizarre the power of one stripe - from 70's to West Elm just like that. And btw it is very cool to see the golden ratio referred to, that is definitely not an every day occurrence.
That's what happens when a family of engineers paints together. ;) I love the golden ratio. It's so facinating and so useful.
This is almost exactly what my dining room looks like, and I love it. (I got the idea from a Behr paint sample booklet.) I get a lot of compliments on it, and it wasn't as hard to do as I feared.
Post a Comment